WildBill's Blogdom

Mongo only pawn, in game of life.

Sun Niagara Inbound…

| Comments

I got lucky! Sun selected me to review a T2000 Niagara box! All right!

The following items have been shipped on March 06, 2006: Part Number and Description Quantity ———————————————- ——– T20-106A-08GA2C 1 SF T2000 6core 1.0GHz 8GB 2x73 X311L 2 NORTH AMERICAN/ASIA PWR CRD KT

6 core, 8GB RAM, 2x73 GB SAS disks. Oh yeah…. Oh yeah. Expect a detailed review to come…

Sun’s T2000 Server - Will It Save the Company?

| Comments

My buddy Moazam has been telling me that the new T2000 (Niagara) box from Sun will turn the company around. Having looked at the specs, it sure sounds interesting.

There’s a twist, however – Sun’s President has just announced a try and buy program for these new boxes. I’ve just applied for one – hopefully I can get my hands on one to test and review. If it’s all its cracked up to be, it may indeed be the shot in the arm the company needs.

Ubuntu, EVDO, and You…

| Comments

Work’s just recently bought a Verizon Wireless / Kyocera KPC650 “wireless broadband” card for both Kyle and myself. These things work great, and they aren’t very hard to get running with Linux. One Caveat: you need a Windows box to “activate” the card for the first time. Once that’s done, you can ditch the Windows box. ;) Kudos to Brian Jepson for writing a killer LinuxDevCenter.com post on how to use wireless devices like this - I’ve taken a good deal of info from that post. Thanks, Brian!

First, to whet your appetite, here’s a screenshot of a DSL Speed Test I ran using the card:

Yes, that’s over a MEGABIT down. Nice!

The card’s a hybrid creature - the PCMCIA card is actually a PCMCIA/Cardbus to USB bridge. The modem/radio portion of the card is usb. When you plug the card in, you’ll see:

Feb 23 11:24:43 localhost kernel: [4362944.165000] PCI: Enabling device 0000:02:00.0 (0000 -> 0002) Feb 23 11:24:43 localhost kernel: [4362944.165000] ACPI: PCI Interrupt 0000:02:00.0[A] -> Link [LNKA] -> GSI 11 (level, low) -> IRQ 11 Feb 23 11:24:43 localhost kernel: [4362944.165000] ohci_hcd 0000:02:00.0: NEC Corporation USB (#9) Feb 23 11:24:43 localhost kernel: [4362944.167000] ohci_hcd 0000:02:00.0: new USB bus registered, assigned bus number 4 Feb 23 11:24:43 localhost kernel: [4362944.167000] ohci_hcd 0000:02:00.0: irq 11, io mem 0x20800000 Feb 23 11:24:44 localhost kernel: [4362944.251000] hub 4-0:1.0: USB hub found Feb 23 11:24:44 localhost kernel: [4362944.251000] hub 4-0:1.0: 1 port detected Feb 23 11:24:44 localhost kernel: [4362944.283000] PCI: Enabling device 0000:02:00.1 (0000 -> 0002) Feb 23 11:24:44 localhost kernel: [4362944.283000] ACPI: PCI Interrupt 0000:02:00.1[B] -> Link [LNKA] -> GSI 11 (level, low) -> IRQ 11 Feb 23 11:24:44 localhost kernel: [4362944.283000] ohci_hcd 0000:02:00.1: NEC Corporation USB (#10) Feb 23 11:24:44 localhost kernel: [4362944.285000] ohci_hcd 0000:02:00.1: new USB bus registered, assigned bus number 5 Feb 23 11:24:44 localhost kernel: [4362944.285000] ohci_hcd 0000:02:00.1: irq 11, io mem 0x20801000 Feb 23 11:24:44 localhost kernel: [4362944.369000] hub 5-0:1.0: USB hub found Feb 23 11:24:44 localhost kernel: [4362944.369000] hub 5-0:1.0: 1 port detected Feb 23 11:24:46 localhost kernel: [4362946.959000] usb 4-1: new full speed USB device using ohci_hcd and address 2

Since the KPC650 is at heart a serially attached USB device, we’ll use the “usbserial” kernel module to connect the card up. I’ve added the following line to my /etc/modules file:

usbserial vendor=0xc88 product=0x17da maxSize=2048

Note the “maxSize=2048” parameter above. That parameter isn’t supported by the “stock” kernels shipped in Ubuntu Breezy (5.10). You’ll need to patch the usbserial kernel module to add that parameter, or you can use the custom kernel package (EDIT: also have the kernel-headers here too) I’d made that already incorporates the patch. That kernel also has some experimental Intel speedstep scaling in it (hence the name), but it shouldn’t hurt anything to run it if you don’t start poking around in /sys. :) Also, the card will work without the “maxSize” parameter, but its connection will be 10x slower (around 100kb/sec) and it’ll be very unreliable. It’s OK for testing purposes, if you want to hack around first without altering your kernel though. The module arguments “vendor=0xc88” and “product=0x17da” tell the usbserial module to engage when a device matching those strings is connected.

Now that you’ve got the kernel patched and the usbserial module loaded, you’ll see the following new messages when you slot the card:

Feb 23 11:24:46 localhost kernel: [4362947.067000] usbserial_generic 4-1:1.0: Generic converter detected Feb 23 11:24:46 localhost kernel: [4362947.071000] usb 4-1: Generic converter now attached to ttyUSB0 Feb 23 11:24:46 localhost kernel: [4362947.073000] usbserial_generic 4-1:1.1: Generic converter detected Feb 23 11:24:46 localhost kernel: [4362947.077000] usb 4-1: Generic converter now attached to ttyUSB1

Now we’ve got a serially attached device, and we can simply hack together some ppp mojo and chatscripts to get this device rockin’. I’ve tar’d up my Verizon KPC650 configs that I use – you can just untar them and put them in the proper locations (file paths are included). Edit /etc/ppp/peers/verizon and /etc/ppp/chap-secrets to put the phone number of your card in the field. I’d inline the scripts themselves, but I know this blog’s on a couple of planet aggregators and this post is running long enough. :)

Now that you’ve got the patched kernel module, the module loaded, and the ppp scripts in place, you can run “sudo pppd call verizon” and the ppp stack will dialout using the KPC650 and you should be connected. Running “sudo pppd disconnect verizon” should take the connection down. I can’t wait to be surfing working from a place where I couldn’t do anything before.

Creating Your Own Multi-boot Linux Pendrive, Courtesy of DSL

| Comments

That’s Damn Small Linux, not Digital Subscriber Line. I’ve been asked by the fellas in #linux to detail how to create a nifty multi-bootable pendrive using Damn Small Linux, so here are the instructions.

What you need:

  • USB pendrive/keychain, 64MB or higher (preferably 128) BACKUP THE DATA ON THIS BEFORE YOU BEGIN. This process will wipe the contents of the pendrive.
  • A computer that’ll boot from USB and CDROM that has 100MB of disk free
  • The DSL ISO file and the DSL embedded ZIP file
  • Some patience (truck, good luck)

So, what you’ll want to do first is get the above two files from the DSL site. Leave the dsl-embedded.zip file alone for now. Burn the DSL ISO to a CD, you’ll need it to boot from. Once you’ve got that CD burned, reboot your system into Damn Small Linux by booting from the CD. Ensure your pendrive’s plugged into the system so that DSL can “see” it when it boots.

Now that you’re in DSL, you’re going to wipe the key and put the Linux bootloader on the key. This is done with the USB-HDD installation. Right click anywhere on the DSL desktop, select Apps -> Tools -> Install to USB pendrive -> For USB-HDD pendrive. Follow the prompts and DSL will be installed to the pendrive, and it’ll make the pendrive bootable.

That’s all fine and dandy, but we’re gonna put some icing on the cake now by putting an open source emulator (QEMU) on the disk and giving you a way to boot DSL within a window, on either Linux or Windows hosts. Yep, that means you can either use your pendrive as a bootable stick, or you can pop that sucker in someone’s PC and run the SAME DSL instance in a window, without installing any software. Pretty damn trick. Here’s how to do that:

Boot back to your computer’s regular OS, wherever you’d downloaded the dsl-embedded.zip file. Once you’re there, simply unzip the contents of dsl-embedded.zip to the root of your USB key, overwriting what the USB-HDD script did. All we really wanted USB-HDD for was for the boot sector.

Now that’s done, you’ll have a dsl-windows.bat and a dsl-linux.sh script in the root of your pendrive. Double click on either (depending on the host OS you’re in) and the appropriate QEMU instance will start, and DSL will boot inside the window, bridging the host OS’s network and everything. It comes in VERY handy to be able to do this - I was able to manage some sick servers for work from a friend’s PC, but was able to use my own trusted computing environment. :)

One last tidbit: the dsl-embedded.zip file alters things so that “native” USB boot under DSL doesn’t work out of the box. All you need to do when booting native is use the following boot options at the bootprompt:
boot: dsl fromhd=/dev/sda1 qemu frugal
That’ll let the kernel know that you’re booting from a qemu-enabled image on /dev/sda1. That’s it!

New Laptop! Wheeee!

| Comments

Not really. Was cleaning out my stuff and found an old Toshiba Portege 610CT. That’s like…. OLD. The BIOS date is 1995. An 11 yr old box. Woot - Pentium/90 with 40MB of RAM. So, armed with an 11 yr old computer, what do I do? Install Linux on it, of course!

I pulled the disk out of this guy and slotted it in a PIII Dell, and booted my copy of Damn Small Linux. Once it booted, I selected “Install to hard disk” and within five minutes it was done. Put the drive back in the Portege and booted it up, and up she came.

It runs surprisingly good for a sub-100Mhz CPU and 40MB of RAM. Here’s some pics:
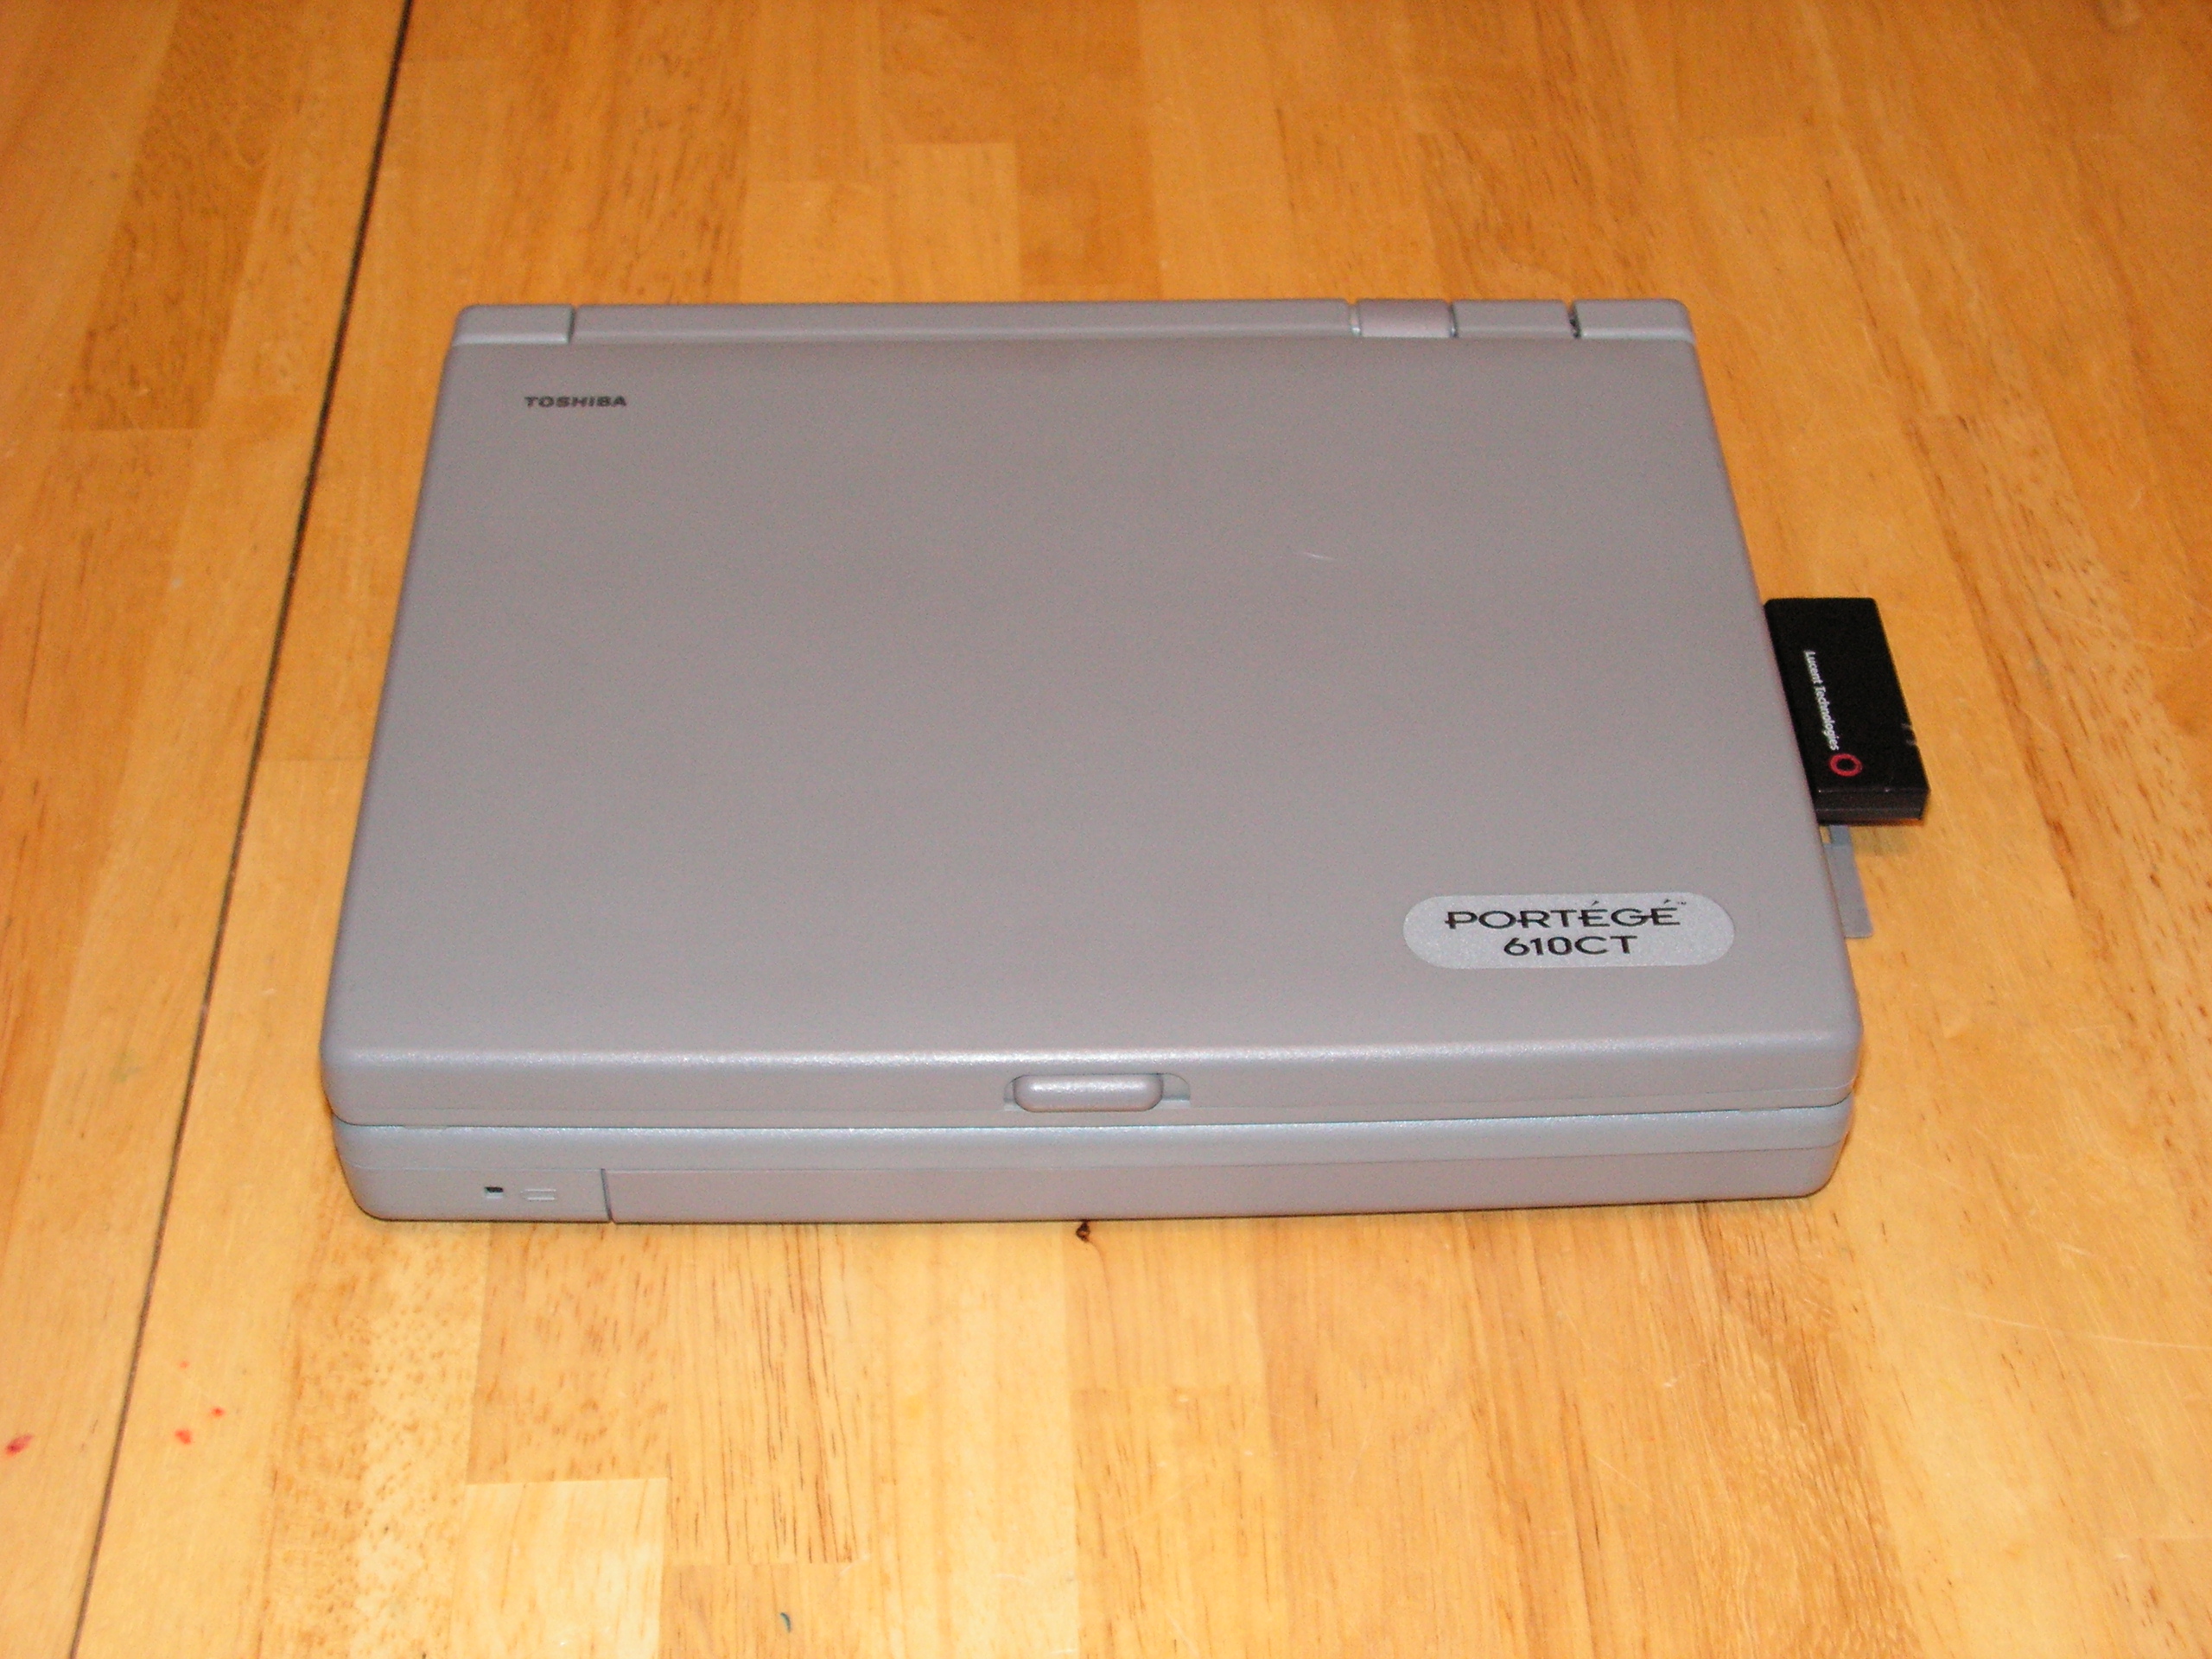
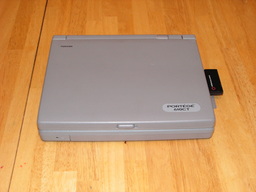
Here’s the unit, closed and off. It’s in great shape for a box that’s twice as old as my daughter.

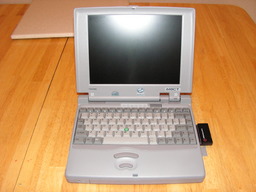
Here it is, ready to be powered on. Note the oldskool Intel lnside logo, and the “Energy Star” certification. That’s gold, my friends.

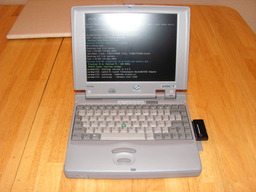
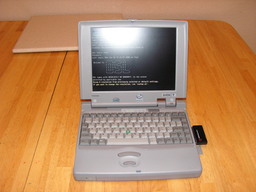
Yay, booting Linux. Check out that wild CPU detection - Pentium 75 - 200Mhz!

We’ve booted, and are logging in. Elapsed time so far: 1 minute 21 seconds. Not terribly bad.

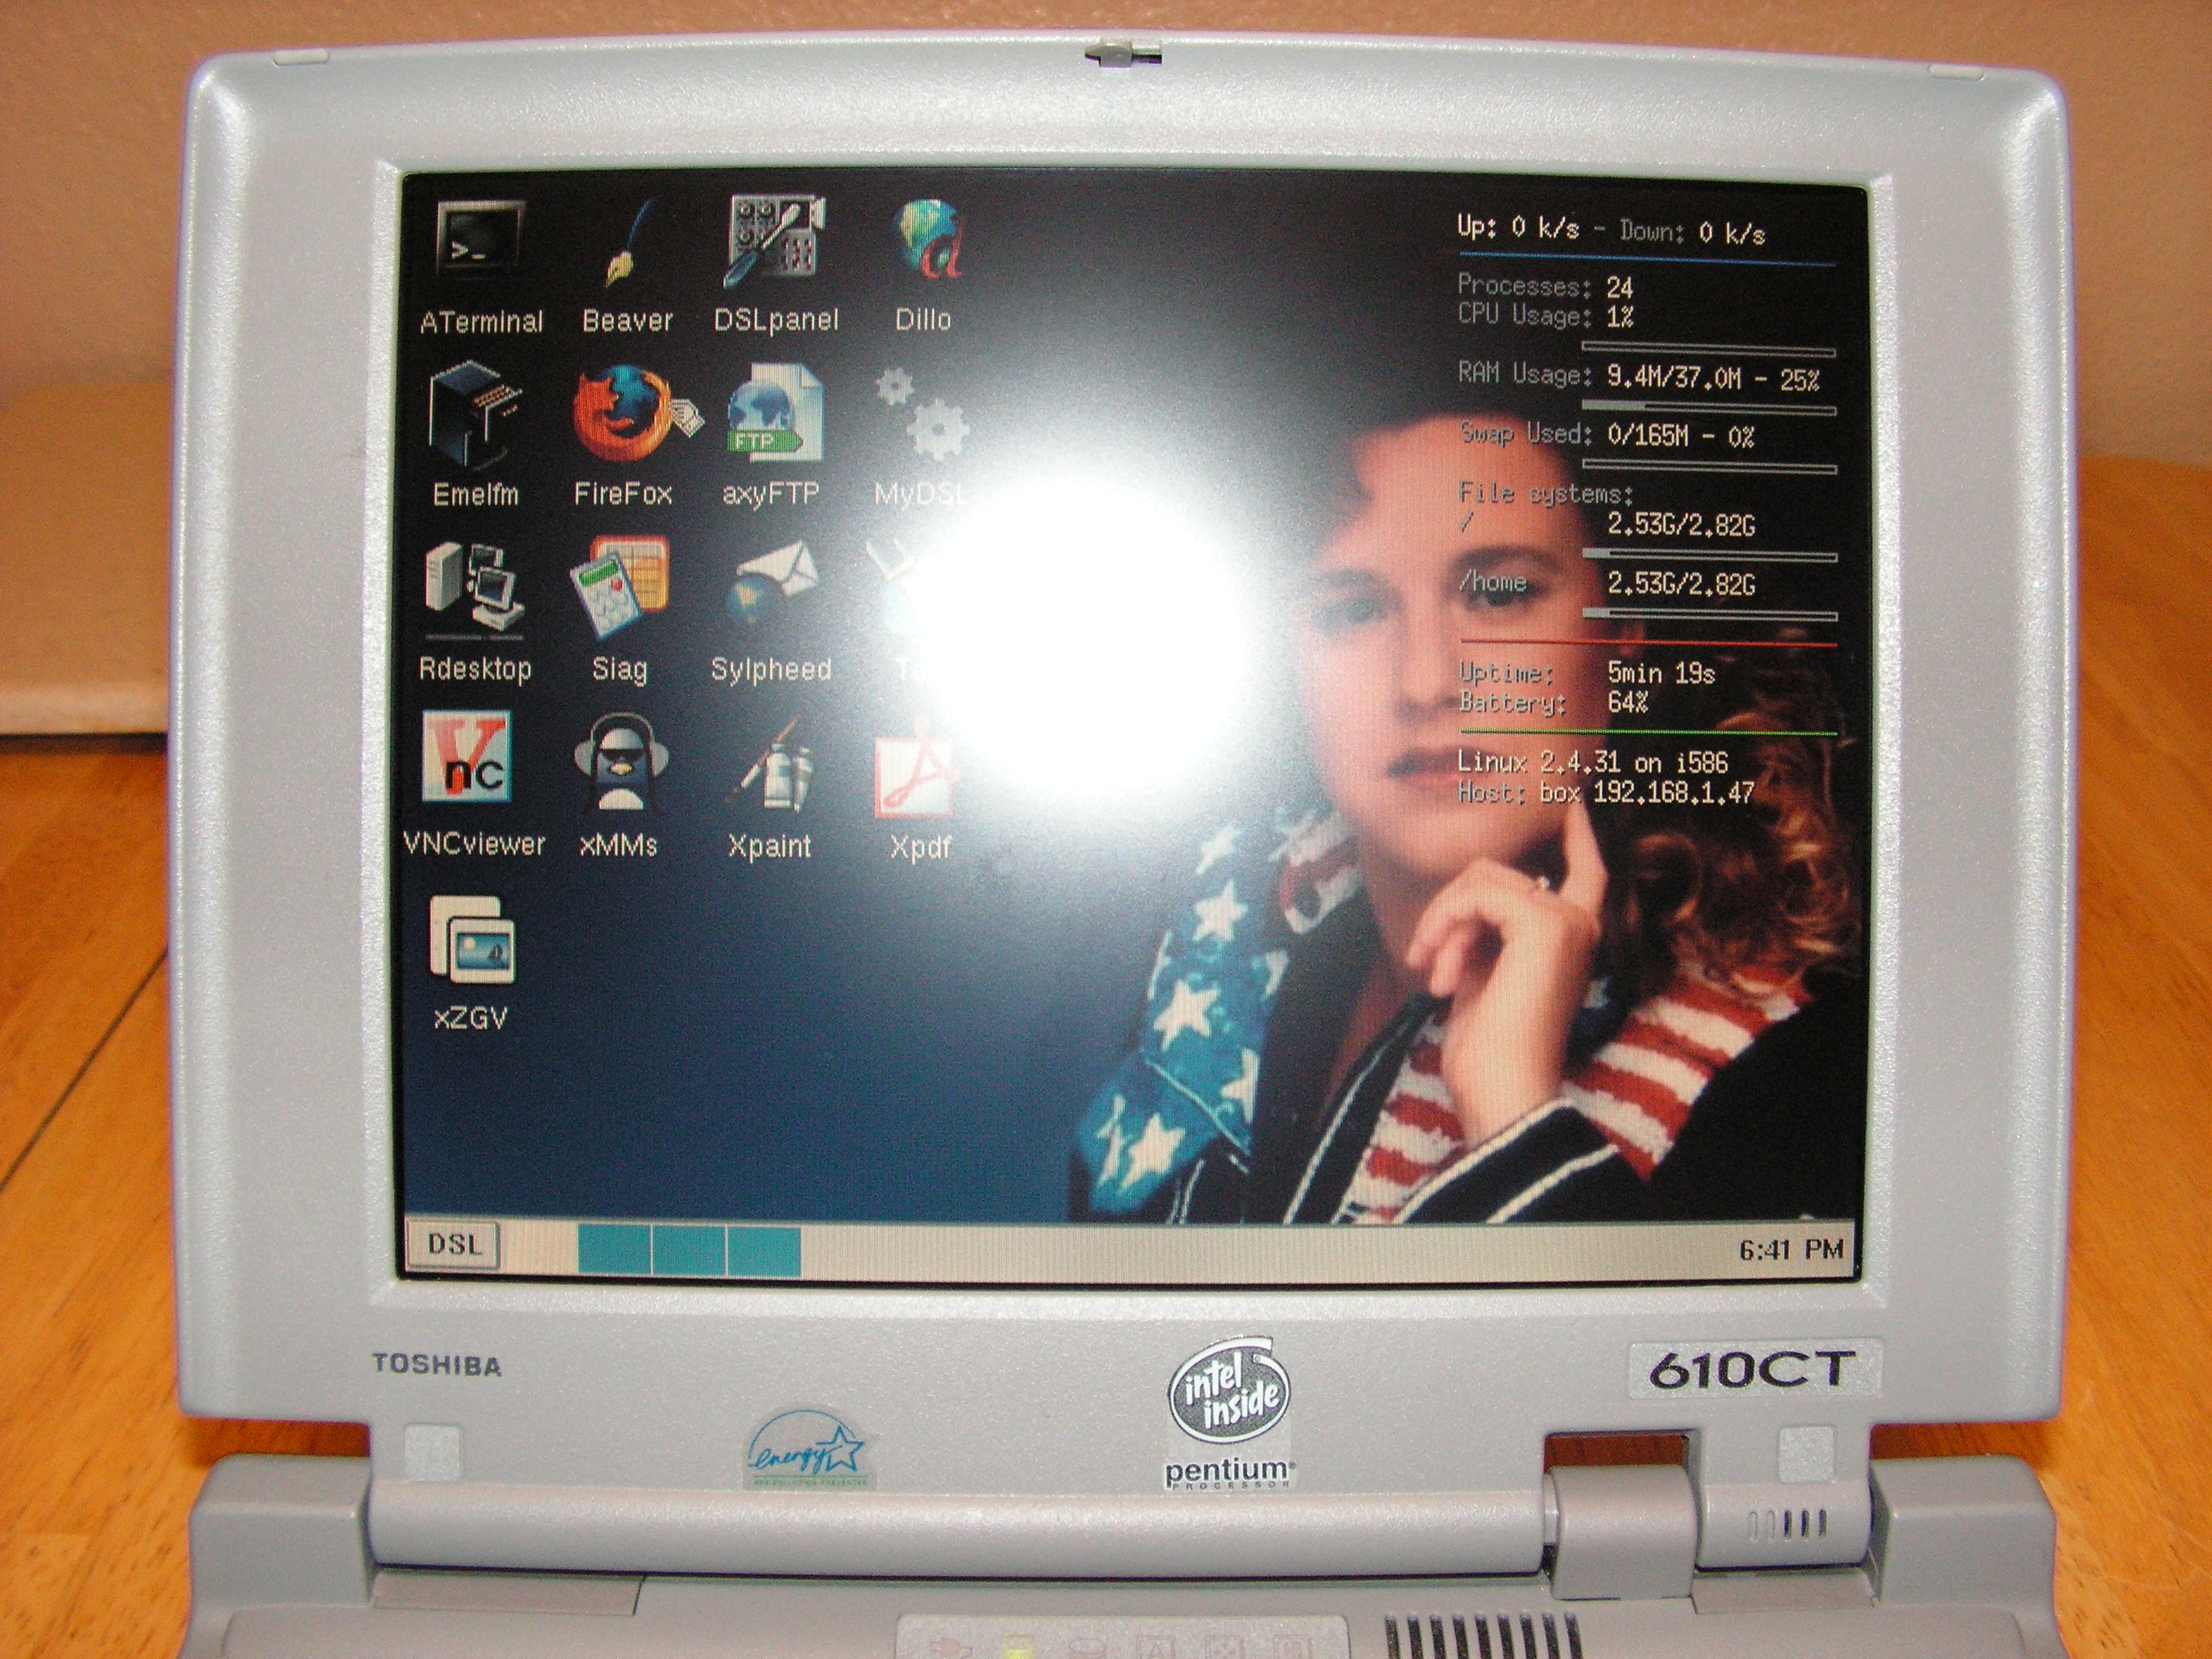
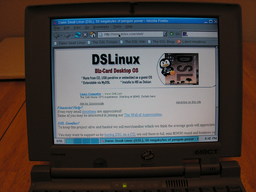
Oh yeah, there’s X! Sorry for the flash flare.

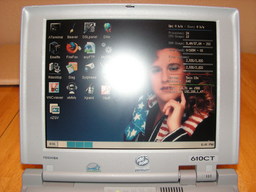
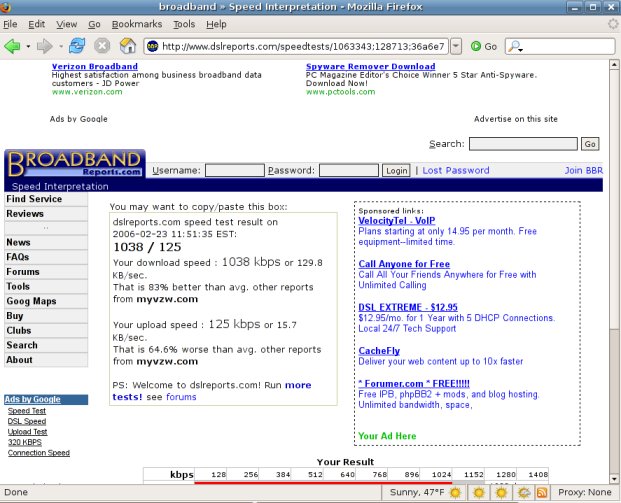
And it runs firefox! No kidding! Check it out:

Note that it is a fairly recent version:

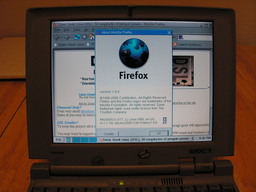
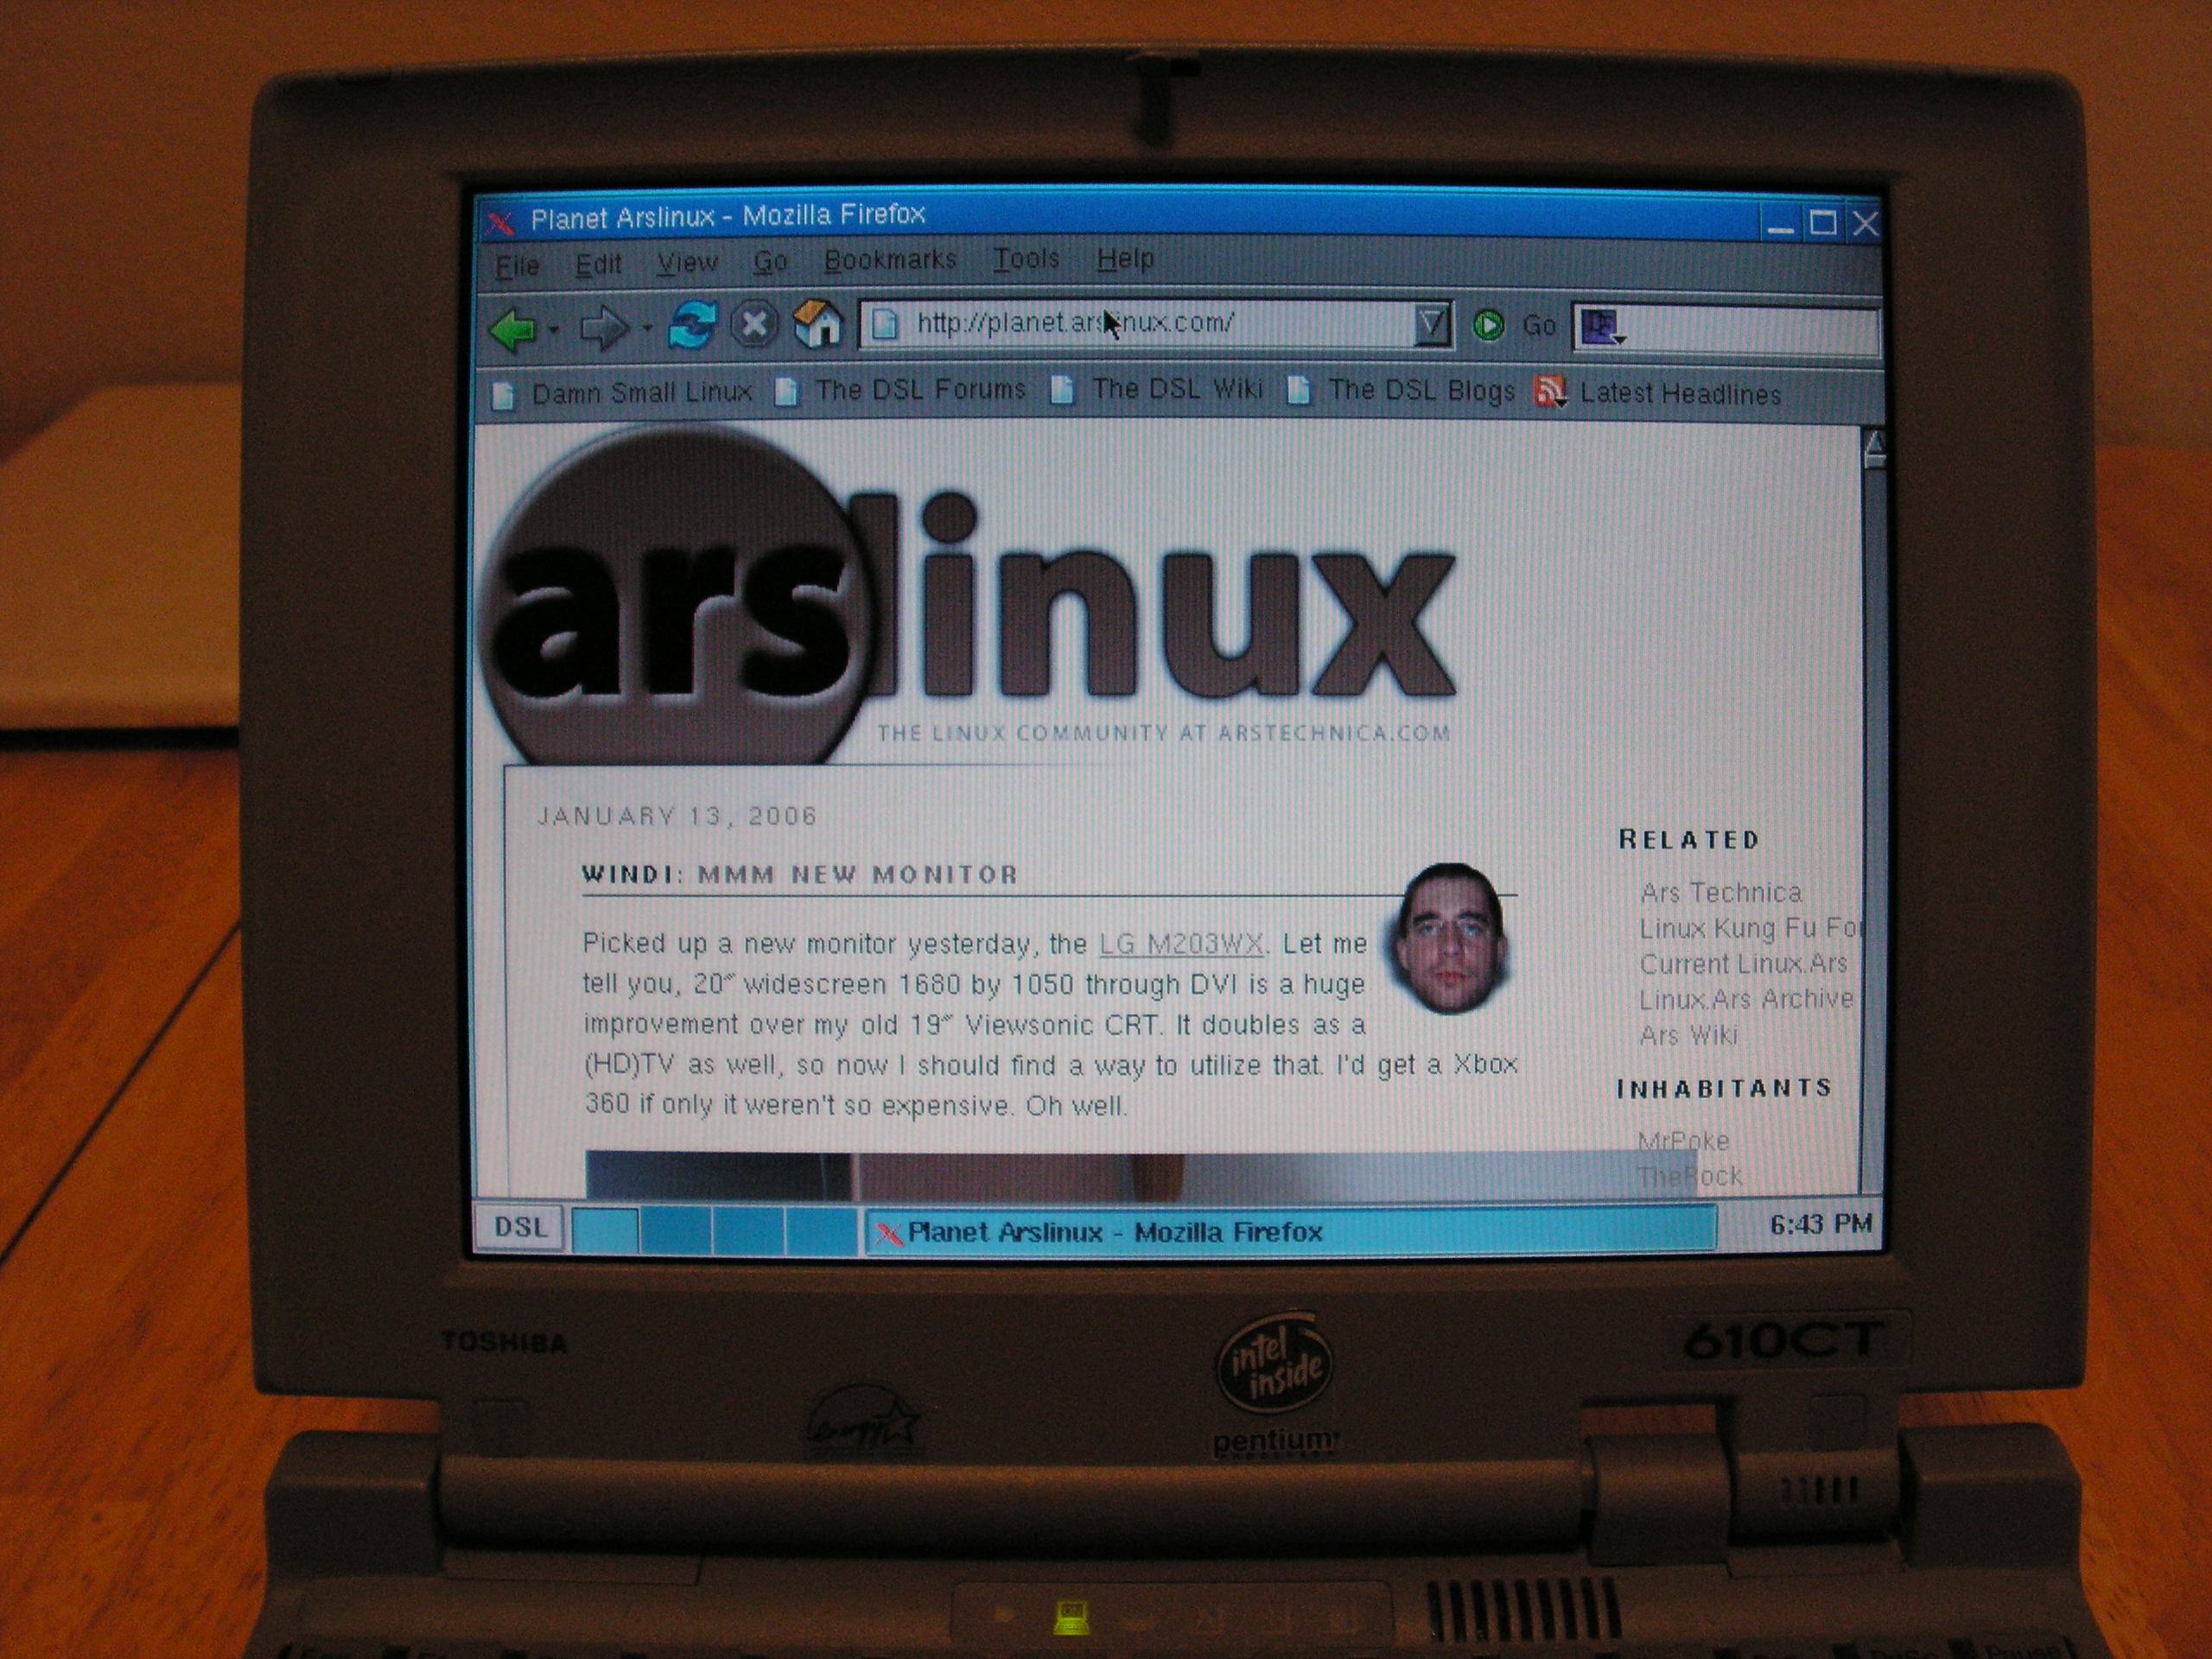
Yep, it renders the ArsLinux planet just fine.

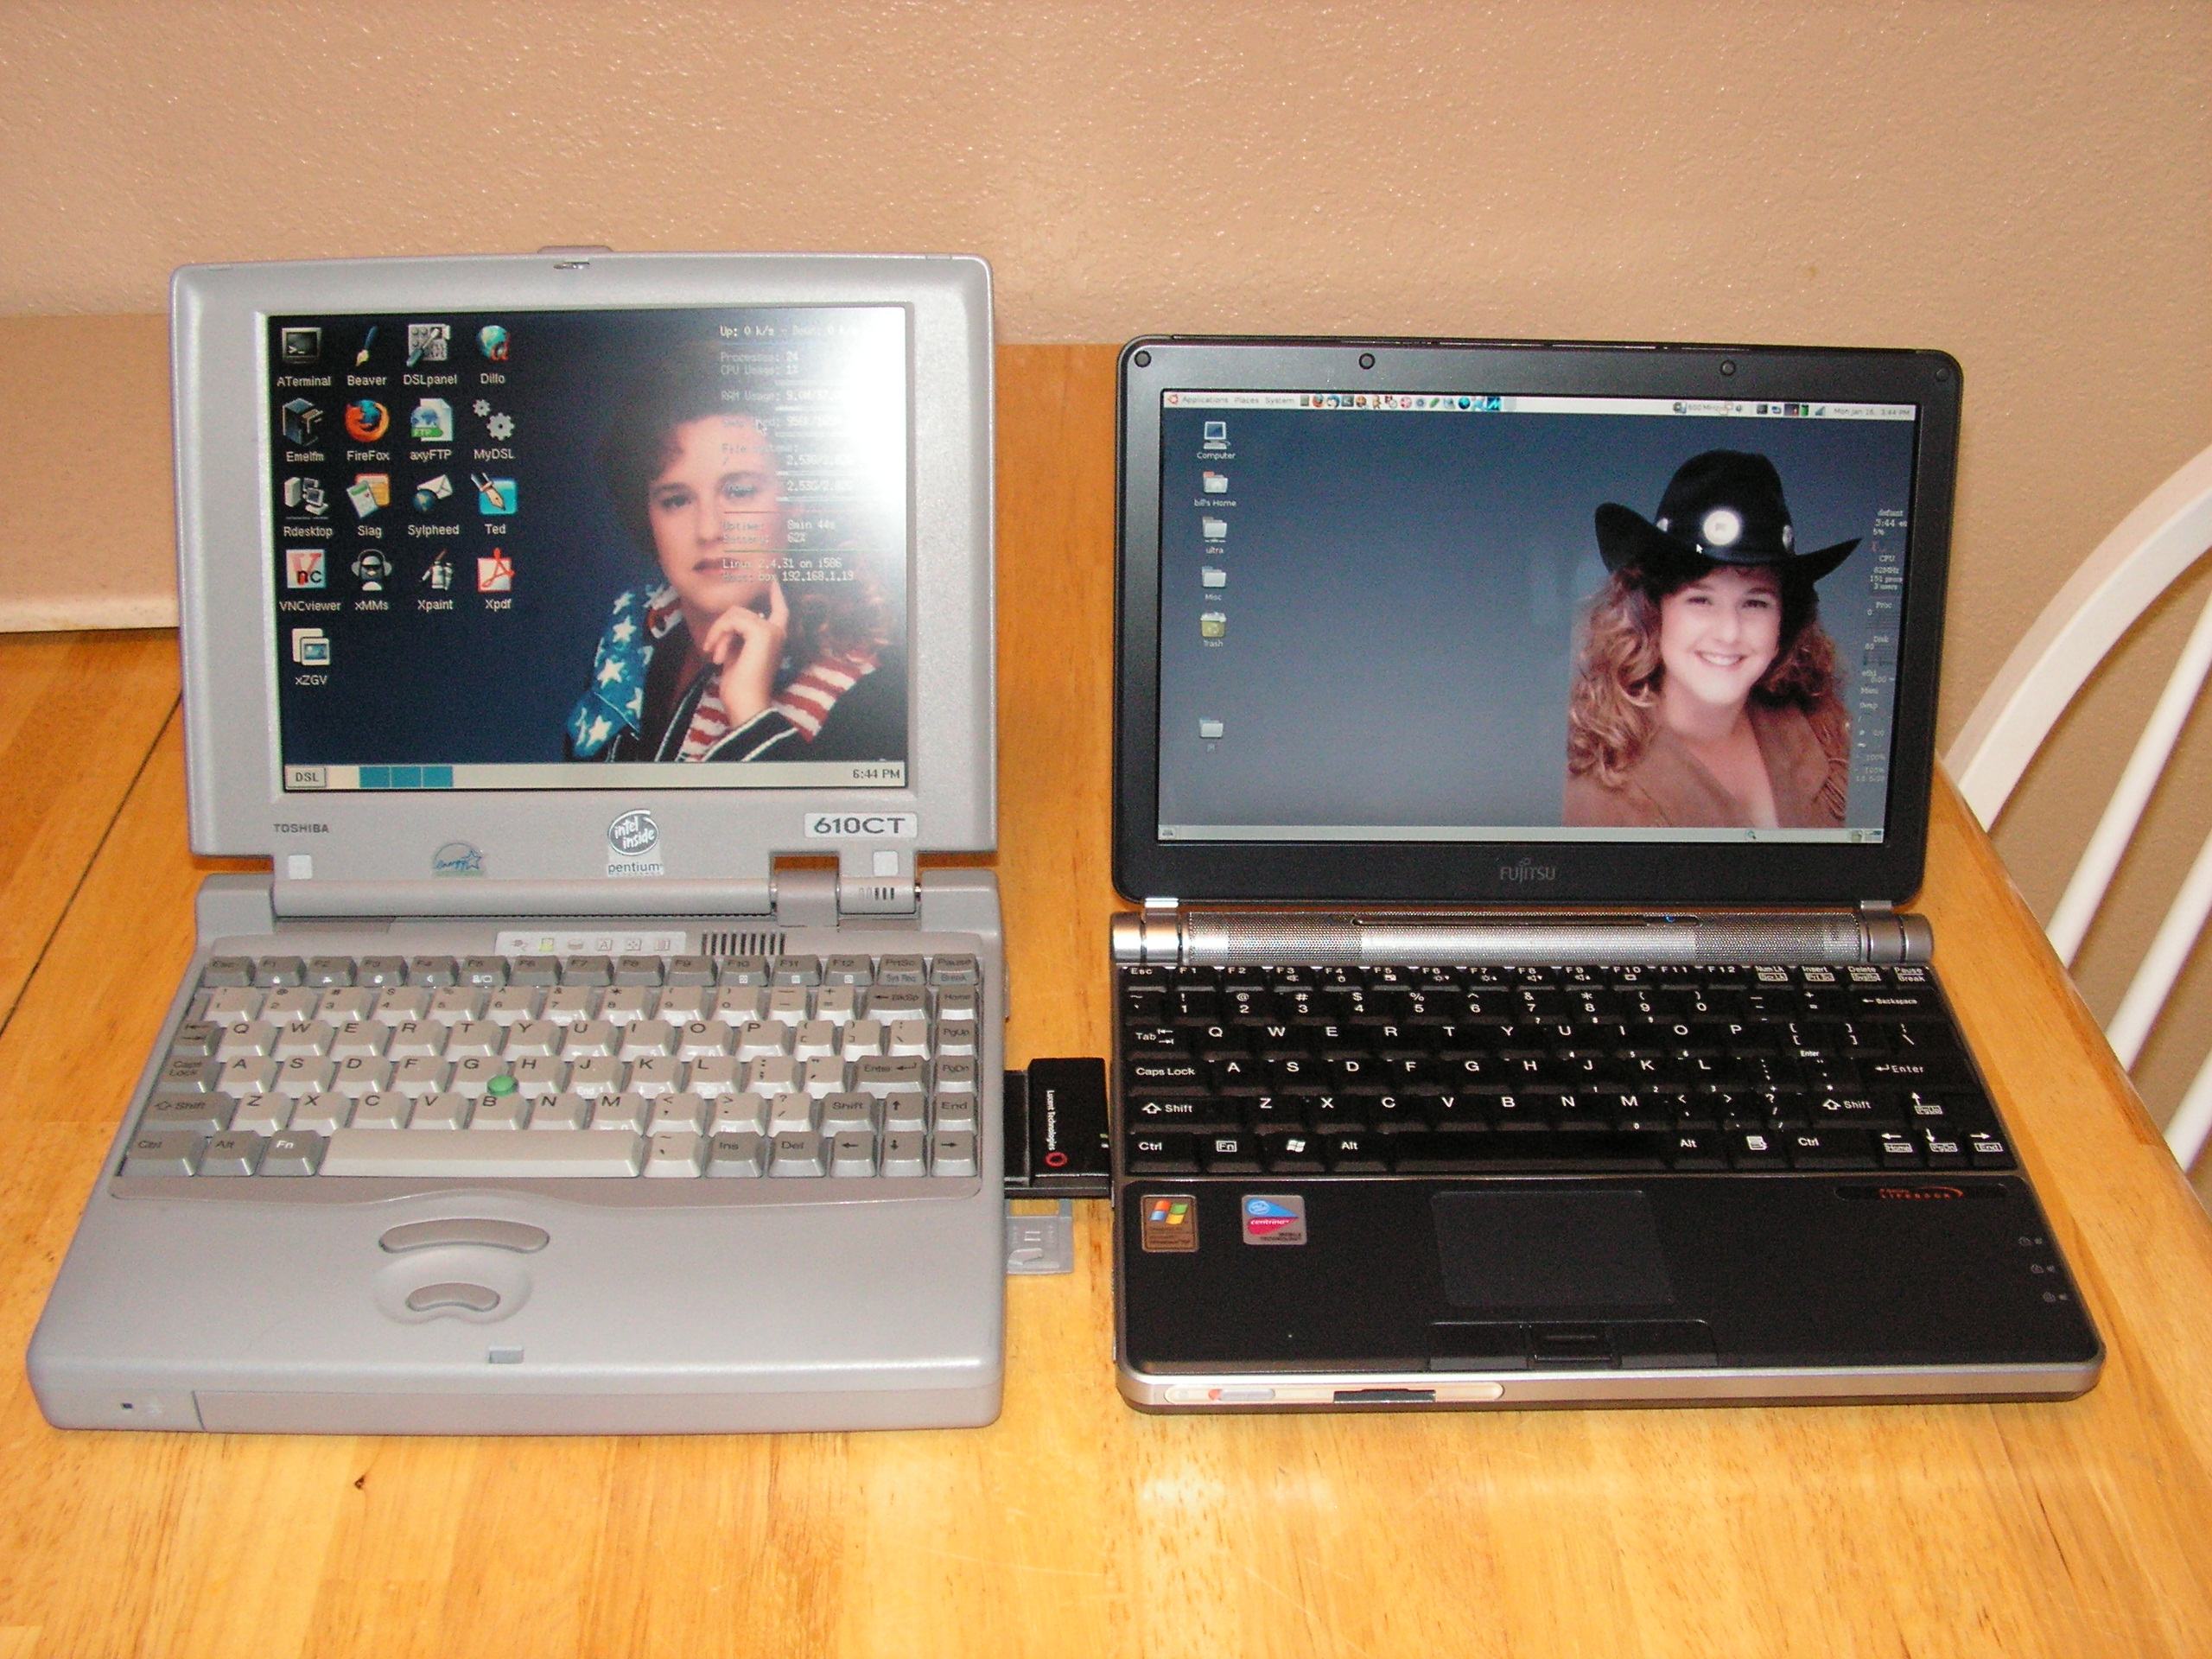
And here it is next to my preciousssssss… the FujiP. This portege is incredibly small for a box that was built in 1995.

If you haven’t fooled with Damn Small Linux, spend some time with it. The ability to install on a very marginal system such as this and actually have a usable platform (slow, but usable) is a good thing to have in your toolbox. Damn Small Linux also installs on a USB key - that’s something every sysadmin should have ready for use in a pinch.